
How to create a multi-part automated conversation in the Web Portal
Using the Automations feature in the Web Portal, it's possible to create a fully interactive, conversational experience for your customers which guides them to certain outcomes and actions based on their responses to your messages.
In this example, let's look a restaurant who want to start offering text-in ordering. An initial message is sent out to a customer base, inviting them to place orders by replying with a keyword - "ORDER" to trigger the automated process.
Automation flow
This diagram shows the basic flow for the automated messages. The triggering keywords are all shown in red, and the flow is based on offering both delivery and pickup options:

Configuring the Automation
This flow requires five individual Automations (one for each keyword) to be created and run together in unison. This is straightforward to complete, as once you have completed the first one it is just a matter of repeating the same steps each time with the relevant content and keywords.
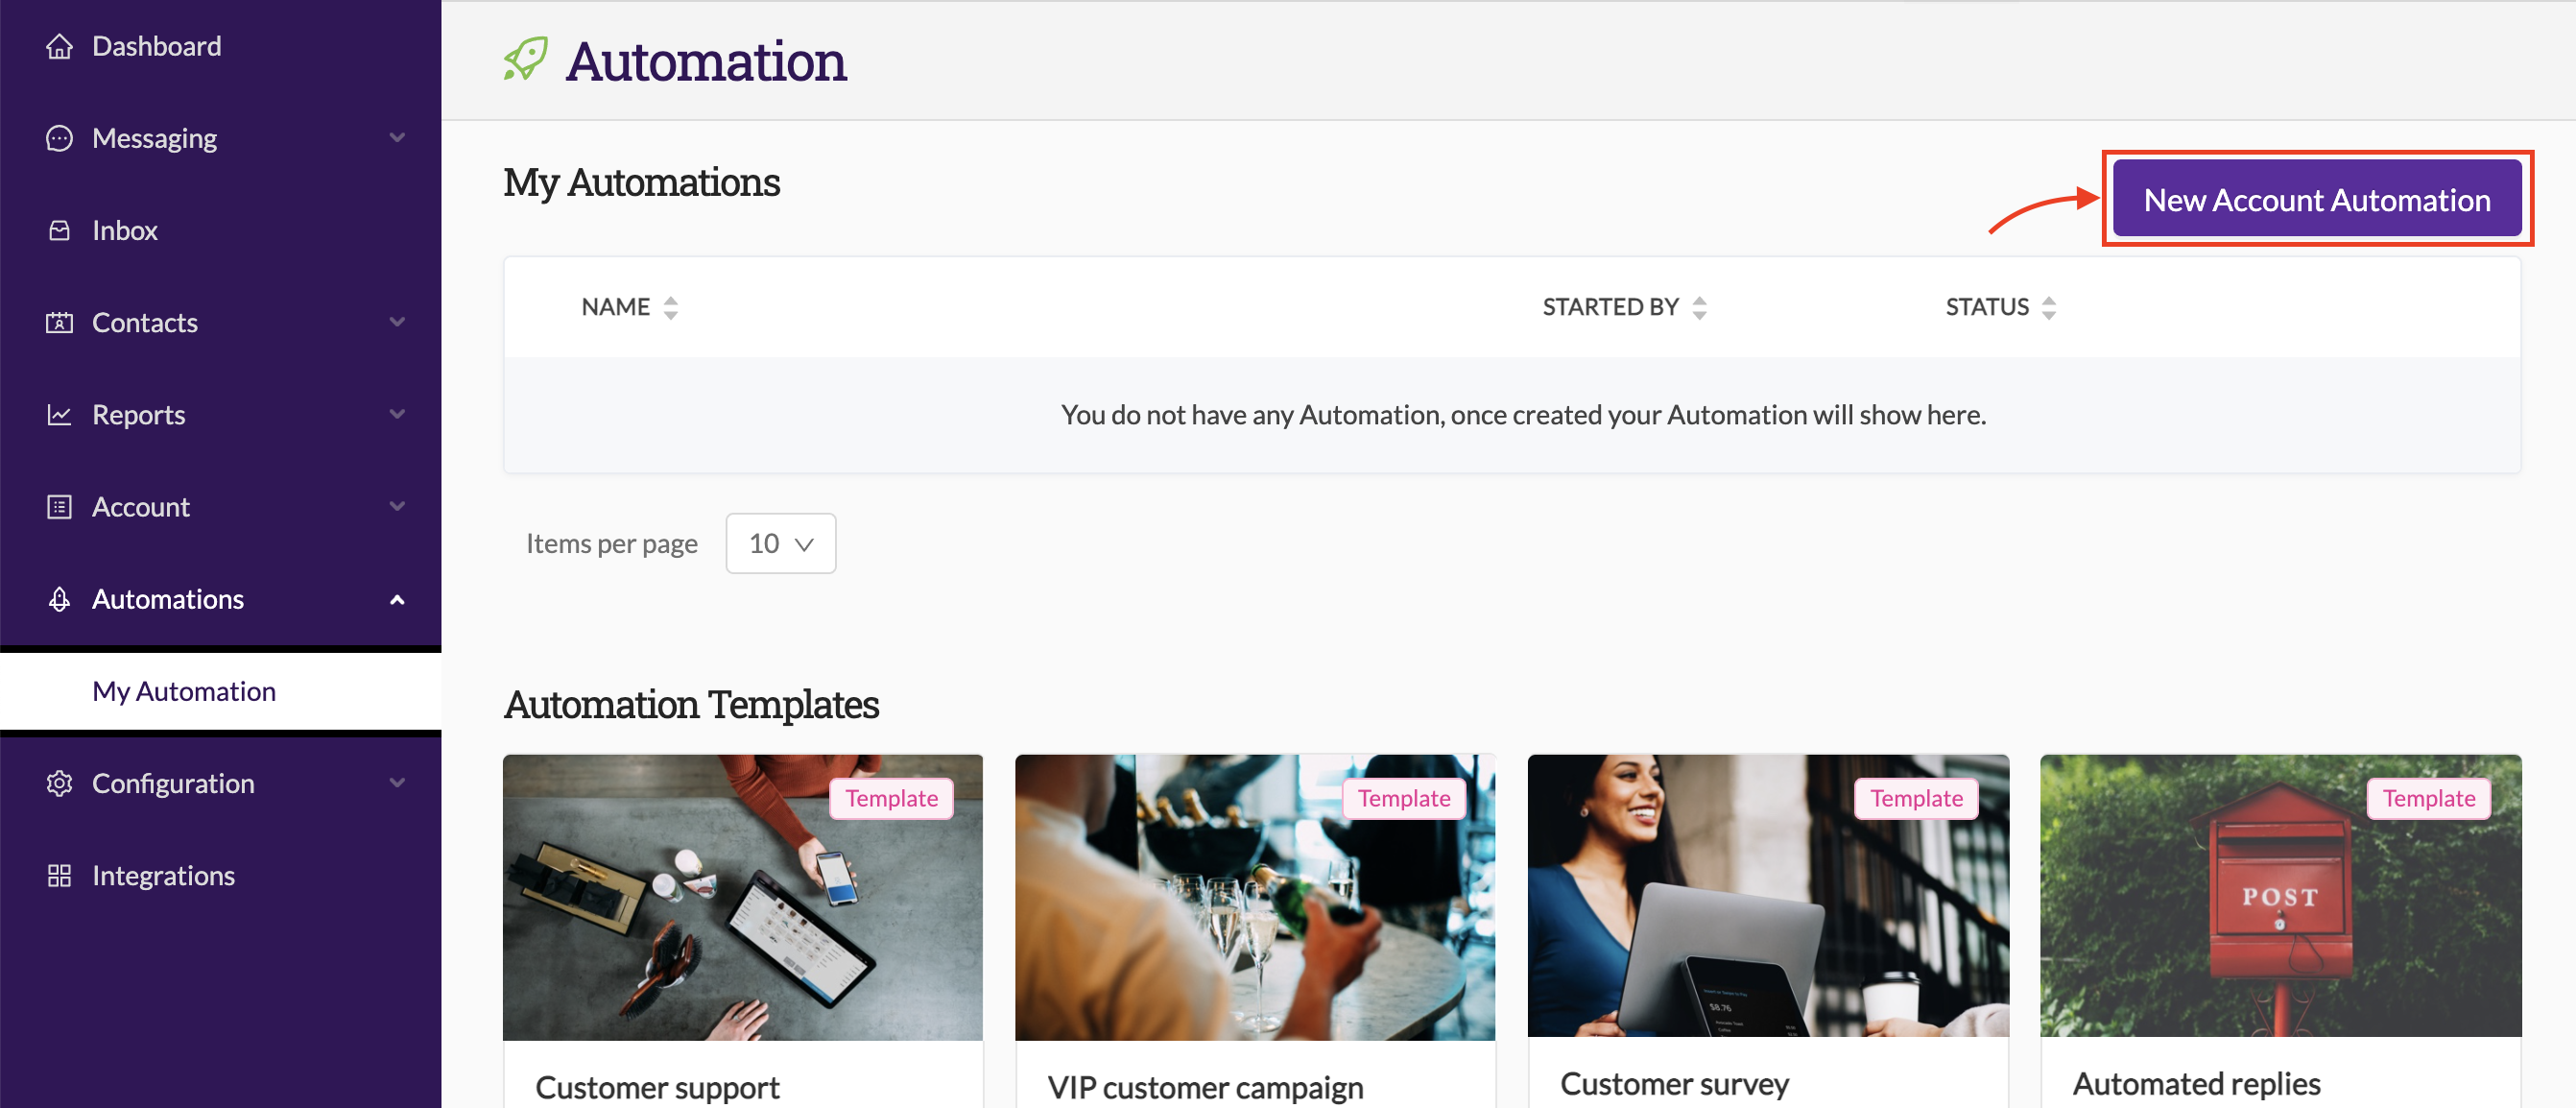
Start by going to "Automation > My Automation" in the main menu of the Web Portal, and select "New Account Automation"
Now, we need to set up the first stage of the flow:

- Name the automation so you can clearly identify it as part of the flow (e.g. "Text orders - stage 1").
- Add a description so you and others can see what this automation relates to.
- Set the message type - in this case, it's an SMS (as will be the case for every stage in this flow).
- Set a message content condition and your keywords (message must contain any of your keywords). Remember, keywords are case sensitive, so it's always a good idea to add your keywords in multiple case formats just in case.
- Set the action that will occur when the keyword is received - in this case the action is to send a reply SMS.
- Populate the message field with the desired content - in this case, this refers to the text in message number 2 in the flow diagram.
Once you are happy with your message content and keywords, click on "Save & Close" in the bottom right of the screen:

From here on, it's just a matter of repeating these steps to create automations for each keyword (naming each automation accordingly - e.g. Stage 2, Stage 3, etc.)
Additional Actions
To add additional actions to an automation, click on "Add Action", and add the action you want the system to perform at that stage of the flow. For example, you may want to add customers to a contact group when they place an order so you can send them further offers and information:


Forwarding messages
In certain stages (e.g. stage 5 of this example) of the flow you may want to set an action to forward the messages to a mobile number or email address if you need to alert other people (e.g. for this example, this may be to notify the kitchen staff to the incoming order):

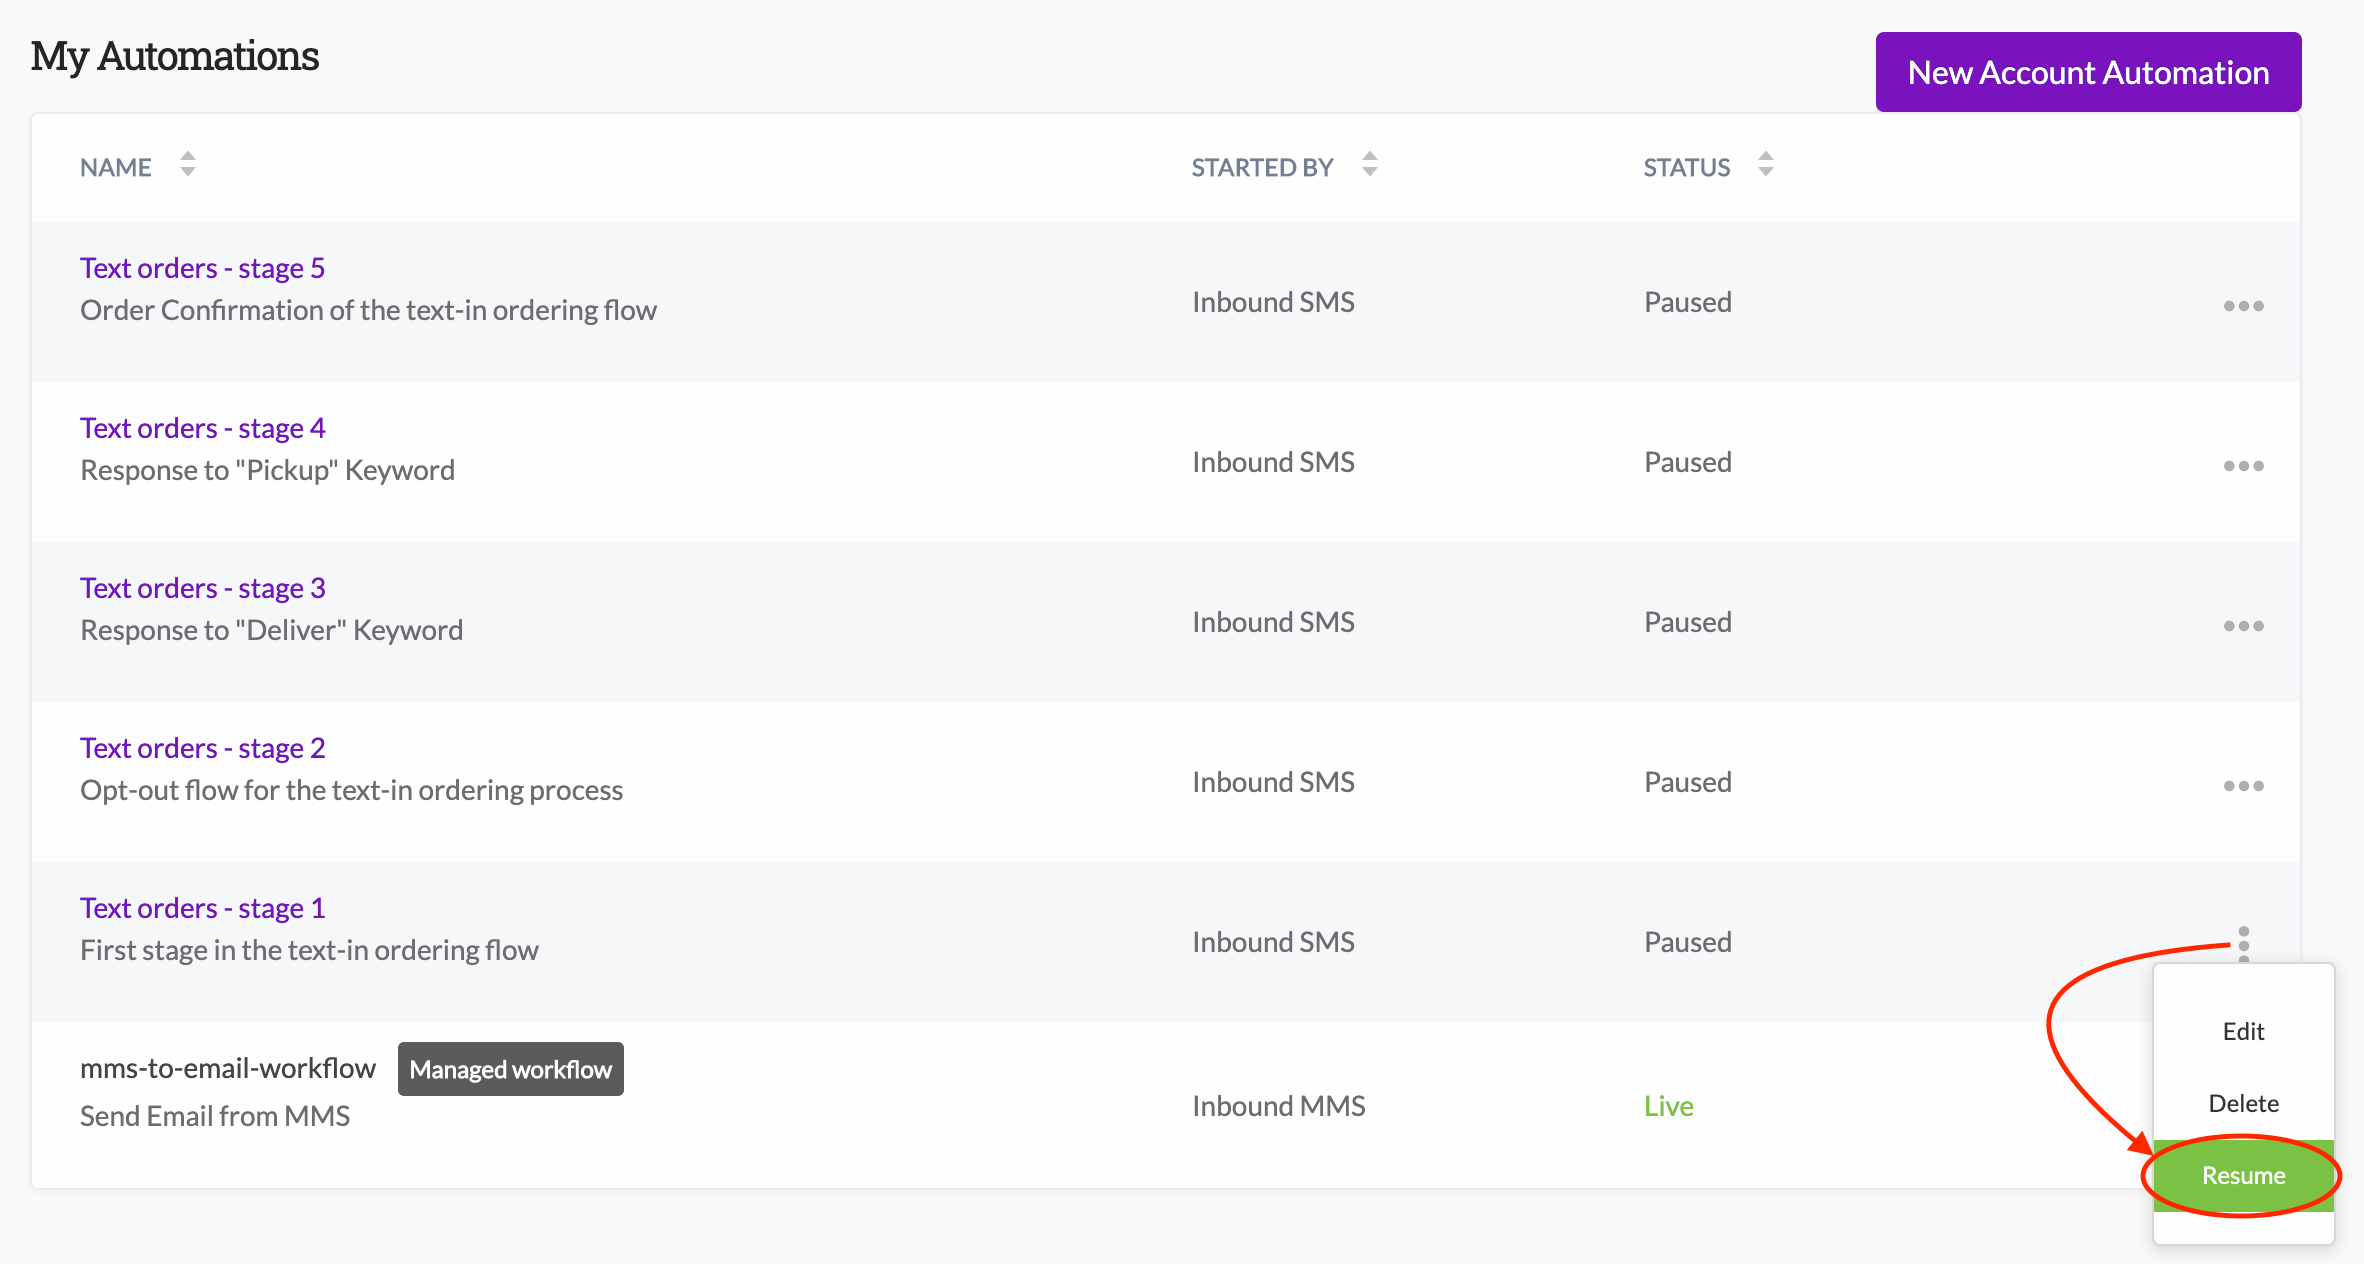
Once you have all of your automations saved, you can activate the flow. Do this by going to the automations list and clicking on the three dots next to each item and then select "Resume" from the resulting menu:
Your automation are now active and will start to trigger when the relevant keywords have been received.
Important things to remember:
- Keep your keywords unique and specific - you cannot use the same keywords for different automations or there will be a clash resulting in multiple messages being triggered
- Avoid using keywords that will be used in general message content elsewhere.
- For example, in the use case shown above, we avoided using numbers for keywords (e.g. "Reply 1 for delivery, 2 for pickup") because we are also asking for recipients to send in their orders by number.
- Had we used 1 and 2 as keywords then the wrong messages (4 and 5) could be triggered when the orders are sent in, in addition to message 6.
- You can use upper case keywords to minimise errors
- For example, if you want to use the words "Yes" and "No", then you can use "YES" and "NO" to avoid someone accidentally triggering an automated response by using "Yes" or "No" in other messages
- It is good practise to map out your overall flow first (complete with message templates) prior to setting up your automated flows. This will help you identify any requirements for additional actions, as well as ensuring that your messages follow a logical flow in terms of their content and relation to each other