
Assigning Conversations in the Inbox
There's a super cool feature in the Hub Inbox that allows you to assign conversations to specific users. There are a lot of benefits to this, especially when you have multiple users, or team members, using the same messaging Hub account to manage conversations.
When you assign a conversation to a user, they'll be notified of any new activity in the conversation, reducing the chance of messages getting missed and leaving your customers feeling like they've been ghosted.
Let's take a look at exactly what the team inbox feature brings to the table...
- How to assign and re-assign conversations to a specific user
- How to filter conversations by assignee
- How to turn on assignment notifications
- How to view the conversation assignment history
- What is the live typing indicator?
Before we dive in, we should flag with you that the feature for assigning conversations is only available on specific plans, so if you can't see this feature in your inbox, chances are you'll likely need to upgrade your plan to have it enabled. Reach out to our Support Team if you'd like to chat more about this.
Also, if you've been sharing logins between users, you're really missing out on all the benefits this feature has to offer – so now is the perfect time to get each of your users set up with their own login. Not sure how to do that? Easy - just read this article and away you go.
Assigning Conversations
When you assign a conversation to a user, you'll have the ability to track who owns each conversation, while providing a consistent and positive experience for the customer. You can easily hand-off a conversation to a colleague by simply re-assigning the conversation, which is super handy if you need to escalate a customer to a manager or more appropriate team member.
There are two places you can assign a conversation:
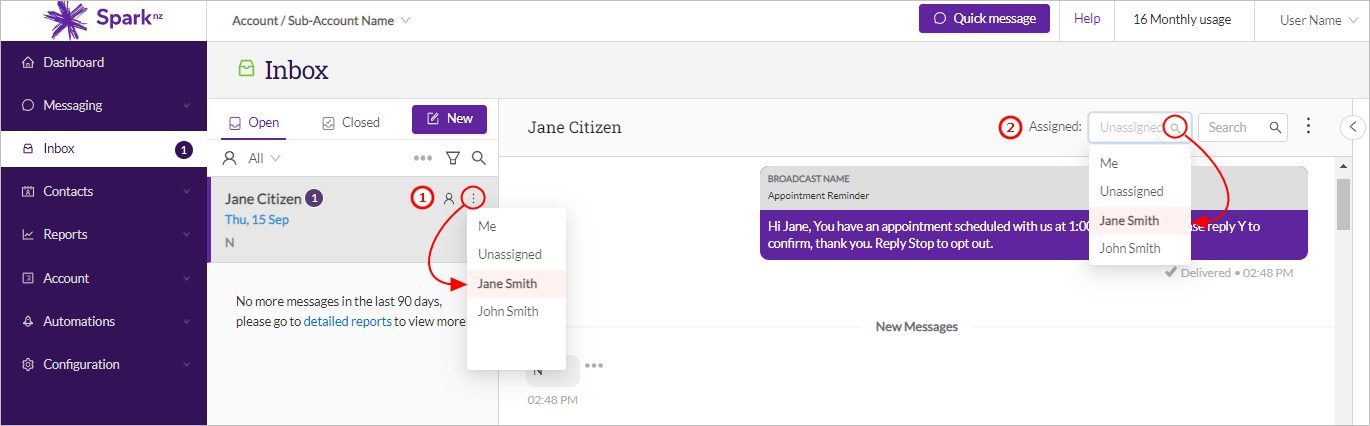
1. From the Inbox - hover over the user icon next to the sender's name in the inbox, then click on the resulting meatball menu and select a user name from the dropdown.
2. From within the Conversation - select the conversation you'd like to assign, then just above the conversation window on the right hand side, click on the arrow in the Assigned field and select a user name from the dropdown.
Assignment Filter
If you have a lot of users managing a lot of conversations, the assignment filter can be a game changer by making it easy for users to find and manage any conversations they're responsible for.
If a conversation has been assigned to a user, there will be a badge with the user's initials to the right of the recipient's name. To filter the inbox by assigned user, just look underneath the Open tab and click on the arrow next to where it says All, then select a name from the dropdown:
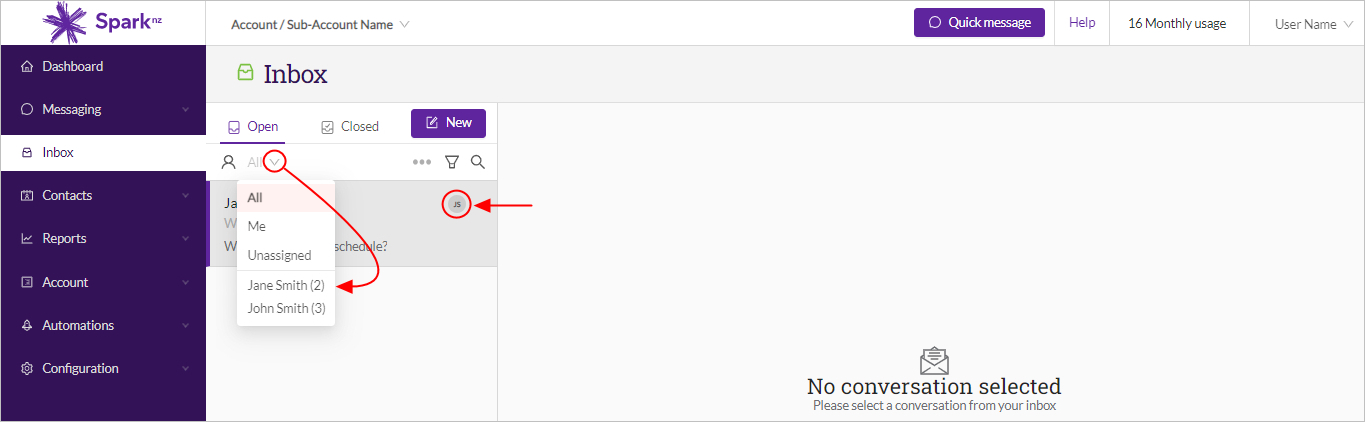
Note - the number of conversations assigned to each user will appear in brackets next to their name.
You can also filter by Unassigned, which is great for making sure all conversations have been assigned to a team member and nothing slips through the cracks!
Assignment Notifications
Turning on inbox notifications means the assigned team member is instantly notified when a new message is received as part of that message thread (provided they're logged in to the messaging Hub, of course), making it much less likely that those important communications get missed. There's no special formula to turning on the assignment notifications – just make sure that the usual desktop notifications are activated, and the rest takes care of itself.
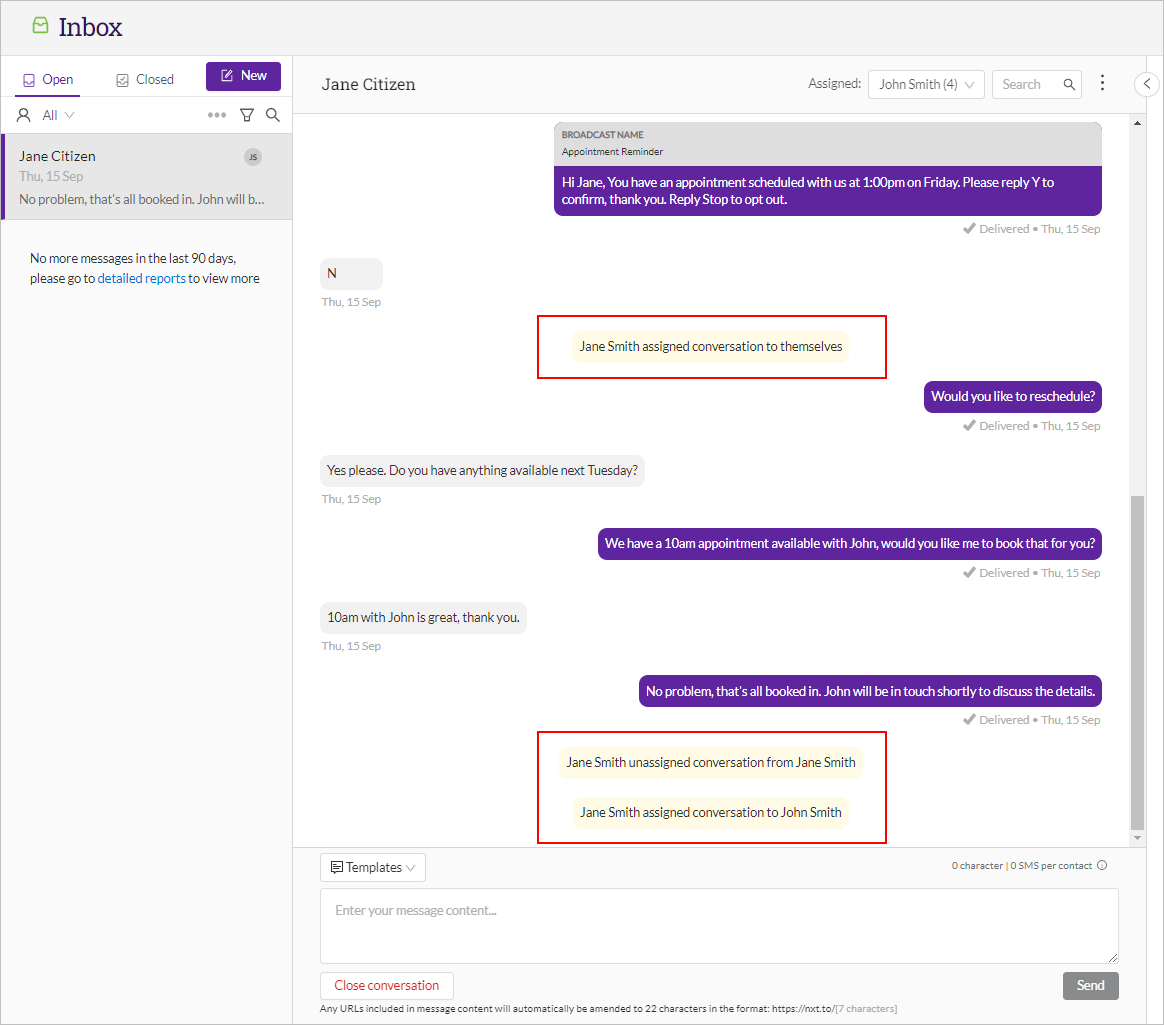
Assignment History
You can easily track who on your team said what and when, by reviewing the assignee history. Just scroll through the conversation history, and the name of any team members assigned to the conversation will be embedded right there in the message thread:
Live Typing Indicator
The live typing indicator, at the bottom left of the conversation window, will let you know in real-time if another team member is already replying to a conversation:
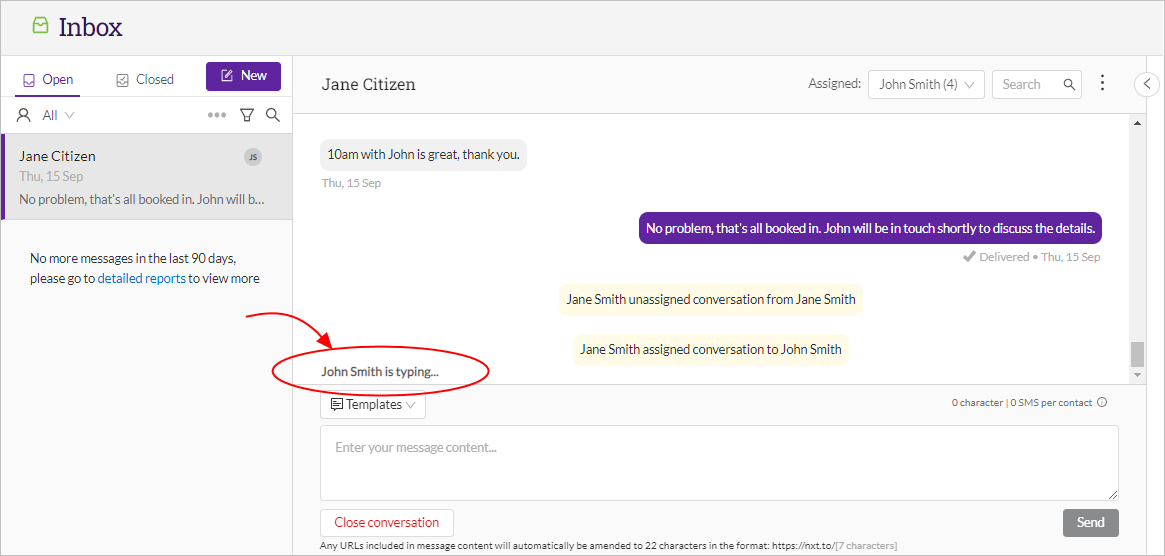
This is helpful in reducing the chance of multiple, different responses being sent to the same customer.